After having worked with GWT several years ago and really liking the framework, I recently found myself trying out Vaadin for a hobby application I want to develop. Vaadin and GWT have their similarities and differences. One of the differences is that Vaadin runs its application logic on the server side, unlike GWT which runs on the client side. This calls for some little extra setup required in the IDE in order to run the application and be able to instantly see UI changes in your browser while developing, without having to restart the application server every time. As a total newbie in Vaadin, I found it a little frustrating that there were no simple instructions on how to achieve this or how it worked. After some digging, I did find a Vaadin blog post that was probably the most helpful, but it only focused on using Eclipse.
We’ll go over setting up a demo application and show how simple UI changes can be reflected in the browser without the need to restart the server thus saving some time. I’ll be using IntelliJ IDEA Community Edition as it requires a few extra steps–the Ultimate Edition makes things even easier as it supports Vaadin and Spring out of the box. The code for these examples can be found here.
Before getting started there are a few important things to point out. Hot swapping a class has some limitations put in place by how the JVM works internally. We will only be able to make “simple” changes–we can’t add new methods, or change method signatures. In such a case a server restart will be required, but it still saves us tons of time when working and testing smaller tasks. There is a very interesting blog post on reloading Java classes, which is also an advertisement for JRebel. JRebel is a commercial product that breaks the barrier of only being able to do “simple” hot swaps, and gives a developer much more freedom. There is also an open-source option called DCEVM which is not as powerful as JRebel, but could be very helpful down the line.
IntelliJ Settings
These should be the default Debugger HotSwap settings, but it’s good to verify them.

Vaadin + Spring Boot
-
Start by creating a Spring Boot project from http://start.spring.io. Download and extract the generated zip file. For dependencies include at least
Vaadin. An optional dependency that I like to use isDevTools. -
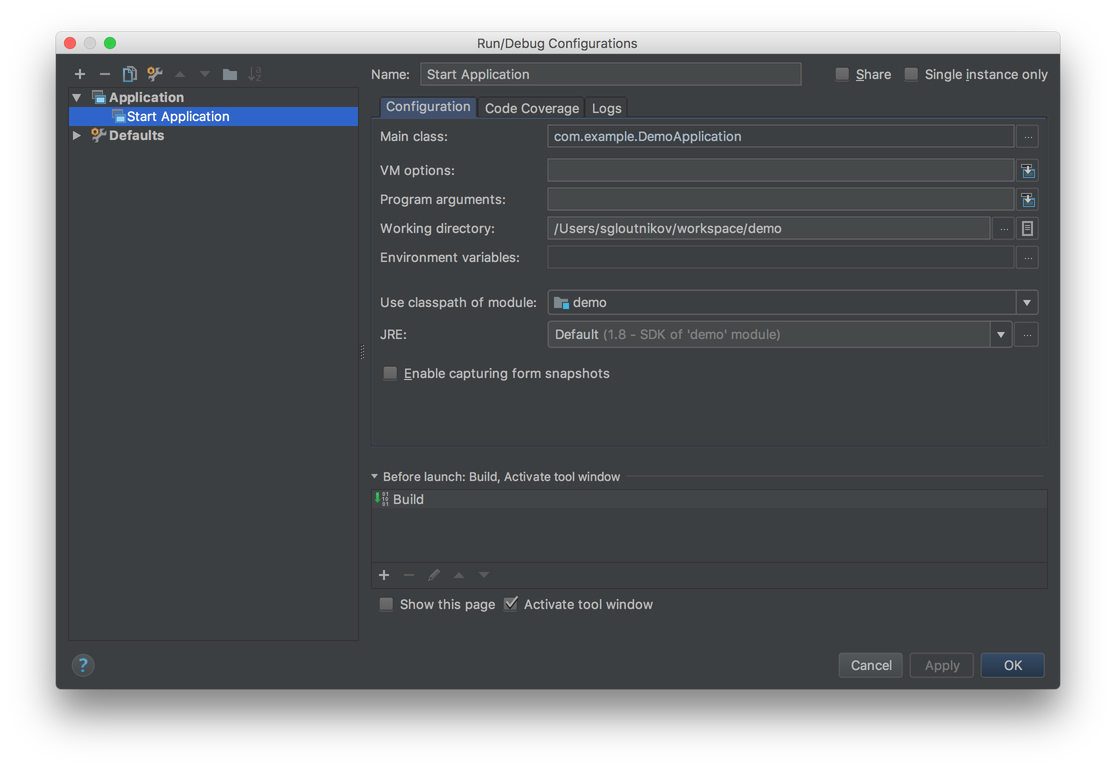
Open the project and create an Application run configuration targeting the class and main method generated by Spring Boot.

- We then add a basic UI class to have something to start with:
@SpringUI
public class MyUI extends UI {
    @Override
    protected void init(VaadinRequest vaadinRequest) {
        Label label = new Label("Hello world!");
        setContent(label);
    }
}
- If
DevToolswas included as a Spring Boot dependency, we need to set a property to stop devtools from automatically restarting the application server when changes are detected. Add the following property inside theapplication.propertiesfile:
spring.devtools.restart.enabled=false
-
Start the application in
Debug Mode–
-
We open up http://localhost:8080 and make sure that the application works fine. Back in IntelliJ we make some changes inside the
MyUIclass and apply them to the already running instance by going toRun > Reload Changed Classesor by right clicking and selectingRecompile MyUI.java. -
After we refresh the browser our changes will be updated, without the need to restart the server.
Default Vaadin Application
- Start by creating a default Vaadin application from the maven archetype https://vaadin.com/framework/get-started
mvn -B archetype:generate -DarchetypeGroupId=com.vaadin -DarchetypeArtifactId=vaadin-archetype-application -DarchetypeVersion=8.0.2 -DgroupId=org.test -DartifactId=vaadin-app -Dversion=1.0-SNAPSHOT
- Import the project into IntelliJ as a Maven project.
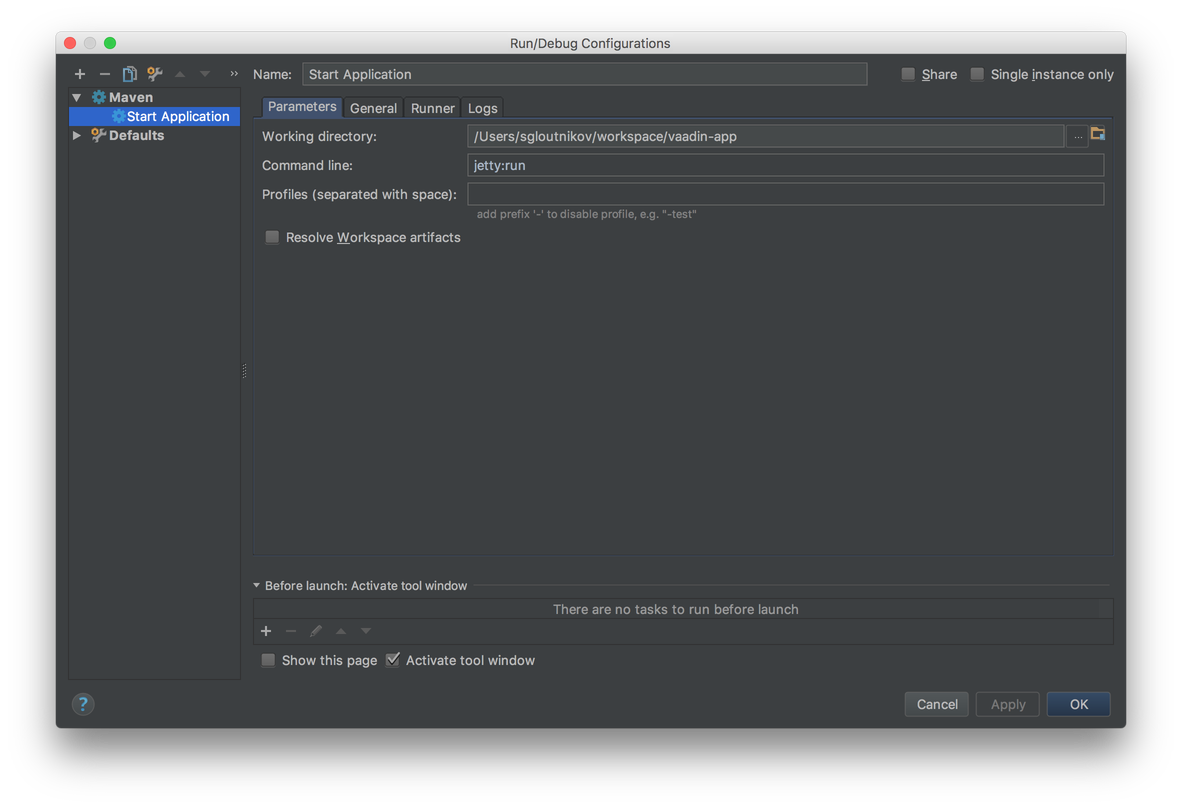
- Create a Maven run configuration and run the application to verify it works at http://localhost:8080

- By default, Vaain uses the Jetty Maven plugin to run and is configured to scan the classpath for changes every 2 seconds. If changes to any classes are found Jetty is restarted. We do not this behavior as we will let our IDE take care of swapping updated classes on the already running Jetty server. To achieve this we edit the
pom.xmlfile and comment out or delete the following lines inside the Jetty plugin configuration:
<configuration>
  <scanIntervalSeconds>2</scanIntervalSeconds>
</configuration>
- Start the application in
Debug Mode–
- We open up http://localhost:8080 again and make sure that the application works fine. Back in IntelliJ we make some changes inside the
MyUIclass and apply them to the already running instance by going toRun > Reload Changed Classesor by right clicking and selectingRecompile MyUI.java. - After we refresh the browser our changes will be updated, without the need to restart Jetty.
